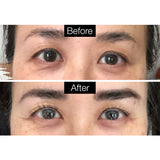
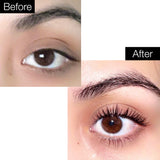
😭
In Stock
Ships from Wellington, NZDue back in stock soon
Popular Lash Lift Kit With Improved Glue Formula
- 1 Kit contains enough product for up to 15 clients making it ideal for salon use.
- Easy to use yet gives great results with natural looking curls.
- 5 Sizes of Lash Lift Pads included for subtle to bold curls.
- Lash lift lasts for up to 8 weeks.
- Vegan approved & cruelty free.
What's Included in the iConsign Lash Lift Kit?
- 1 Bottle of Perm (5ml - white cream) - Softens eyelashes and prepares them for lash lift process.
- 1 Bottle of Fixation (5ml - blue cream) - Helps lashes to hold their curl for longer.
- 1 Bottle of Nutrition (5ml - yellow liquid) - Nourishes the lashes.
- 1 Bottle of Cleanser (5ml - clear liquid) - Removes the lash lift glue residue from the lashes while conditioning the lashes.
- 1 Brush on Bottle of Lash Lift Glue (7ml)
- 5 Pairs of Silicone Lash Lift Shields (includes sizes S, M, M1, M2 & L)
- 3 Y Combs (used for brushing lashes onto silicone pads and removing excess glue)
- 3 Pairs of Under Eye Pads
- 5 Mascara Wands
- 10 Microbrushes
Detailed Instructions for iConsign Lash Lift Kit
Pro Tip: Take your time and do not rush through the steps. A little more patience and time will give much better results.
Your client's eyes should remain closed during the entire procedure.
- Use the #4 Cleanser to clean the eyelid and eyelashes of any oil, dust and makeup residue. Dab dry with a clean towel.
- Use a pair of under eye pads (gold pouch) to cover all the eyelashes below each eye.
- Select the size of silicon lash lift shields that best suits your client's eyelashes and desired look (see images for a sizing guide).
- Apply lash lift glue to the flat side of the silicone lash lift shields, wait 20 seconds and then place the flat side of the shields on the eyelid just above the lash line.
- Now apply a thin layer of lash lift glue to the curved side of the silicone lash lift shields. Take extra care to avoid getting any glue in the eye.
- Wait 30 seconds, then use a Y Comb (comb side) to brush the lashes up onto the shield. This is the most important step and will determine the final look so take your time. Ideally the full length of every lash should be stuck to the shield with none of the lashes crossing each other.
- Use the Y Comb (flat side) to remove any excess lash glue from the lashes. Wipe the Y Comb clean with a tissue.
- Use a microbrush to carefully apply #1 Perm to the lashes taking care to avoid getting any in the eyes. Tighten #1 Perm cap immediately after use. Cover lashes with plastic wrap or glad wrap/cling film and wait:
- Fine lashes: 6 minutes
- Normal lashes: 6-8 minutes
- Coarse lashes: 8-10 minutes
- Remove the plastic wrap. Remove #1 Perm cream using the Y Comb (flat side). Wipe the Y Comb clean with a tissue.
- Use a microbrush to carefully apply #2 Fixation to the lashes taking care to avoid getting any in the eyes. Tighten #2 Fixation cap immediately after use.
- Cover lashes with plastic wrap and wait 8-12 minutes before removing the plastic wrap.
- Use a microbrush to apply #4 Cleanser to the lashes and silicone shield. Use the Y Comb tool (comb side) to clean off all residue.
- Use the same microbrush to apply #4 Cleanser to the back of the silicone shield. As the cleanser softens the glue you will be able to gently peel the silicone shield off the skin. Continue applying cleanser behind the shield while slowly and carefully removing. To avoid discomfort, do not pull firmly.
- Use a mascara wand to apply #3 Nutrition to the lashes and brush it through.
Note: For best results your client should keep their lashes dry for the first 24 hours. Mascara can be applied AFTER the first 24 hours.
Shelf Life
Unopened: 18 Months
Use within 3 months of opening.
Ingredients
See last image.


